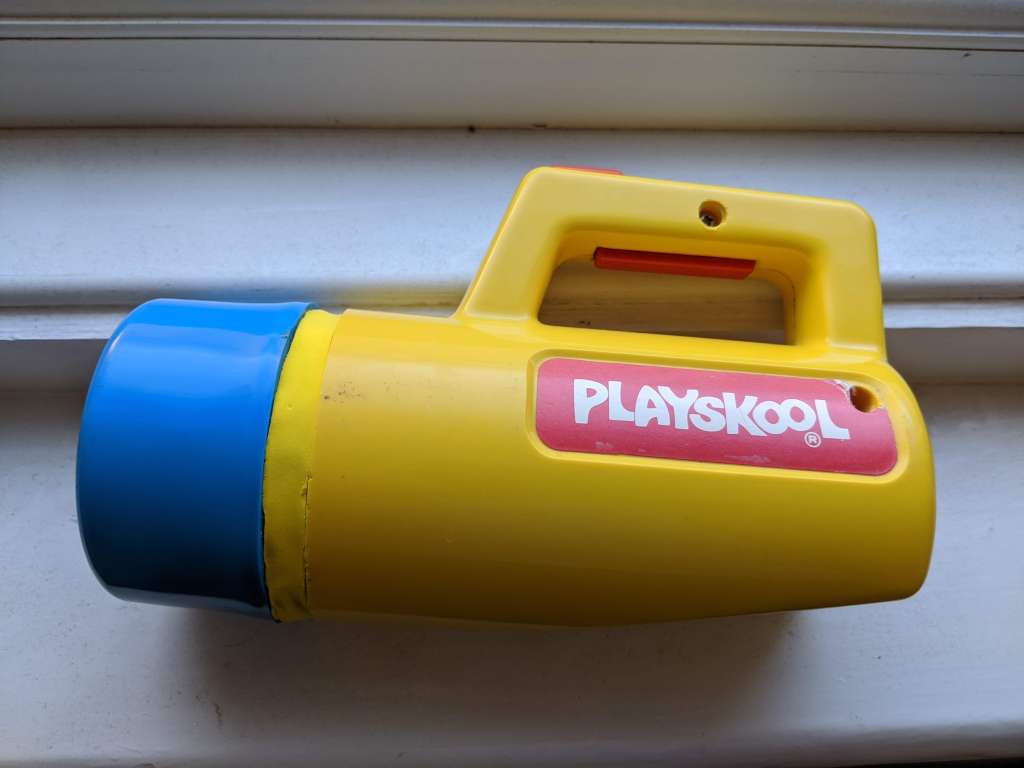
This week I took an original 1980s Playskool plastic flashlight, removed the insides and replaced them with a 4000 lumen flashlight.
Inspiration
There’s been a few posts on r/flashlight about the 1980s kids Playskool flashlight and various comments about the potential to modify one. A few weeks back, someone posted a video their Astrolux FT03 inside a Playskool light. I already had an FT03 and thought it was such a good idea that I ordered a cheap Playskool light from eBay.
The FT03 comes in a few different versions. Mine has the XHP50.2 LED, which is about 4300lm and 735m throw. You can buy the FT03 from Banggood.
Initial build
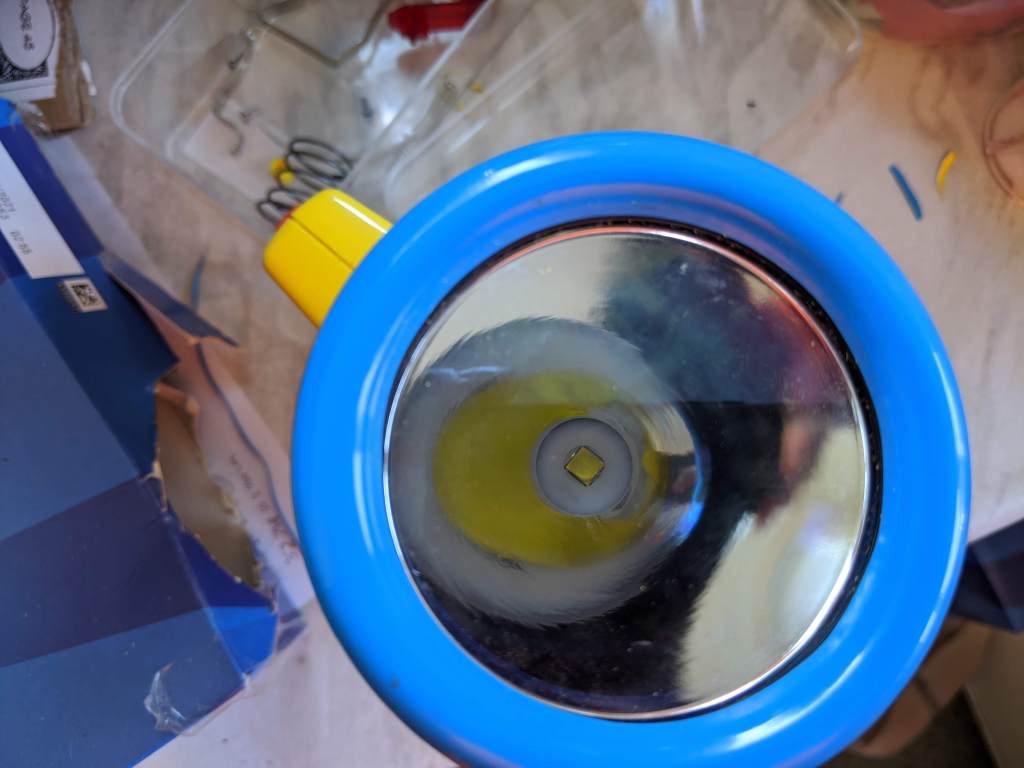
The first step was taking off the blue plastic bezel. This was a challenge and was similar to removing a tyre off a bike wheel.
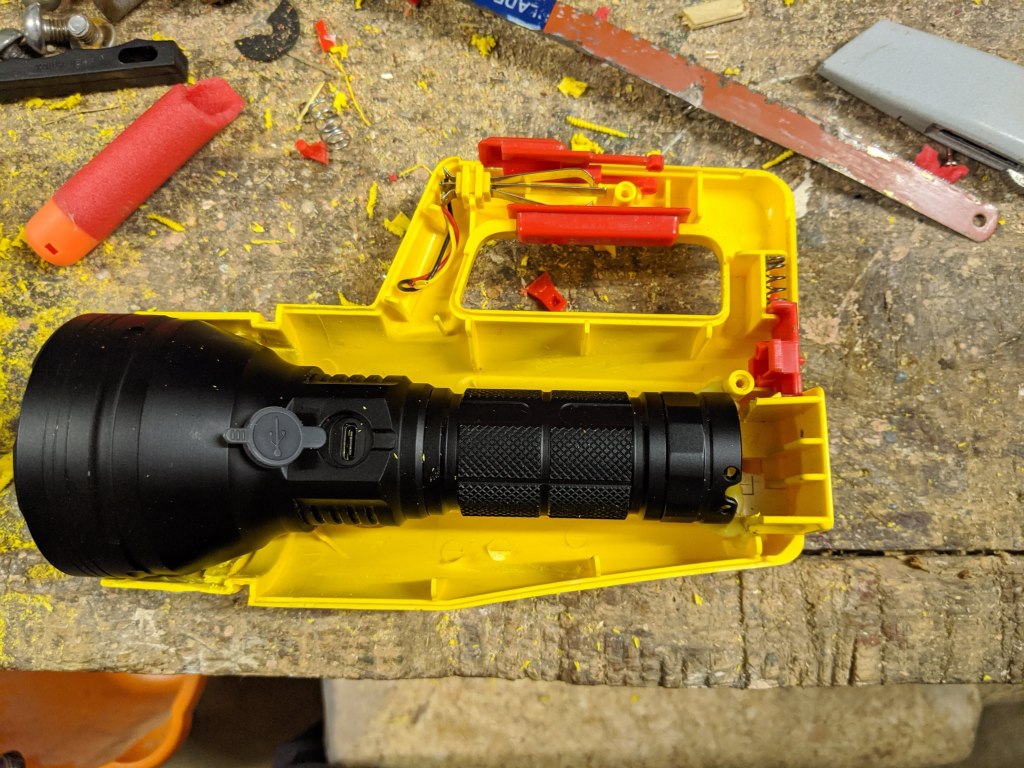
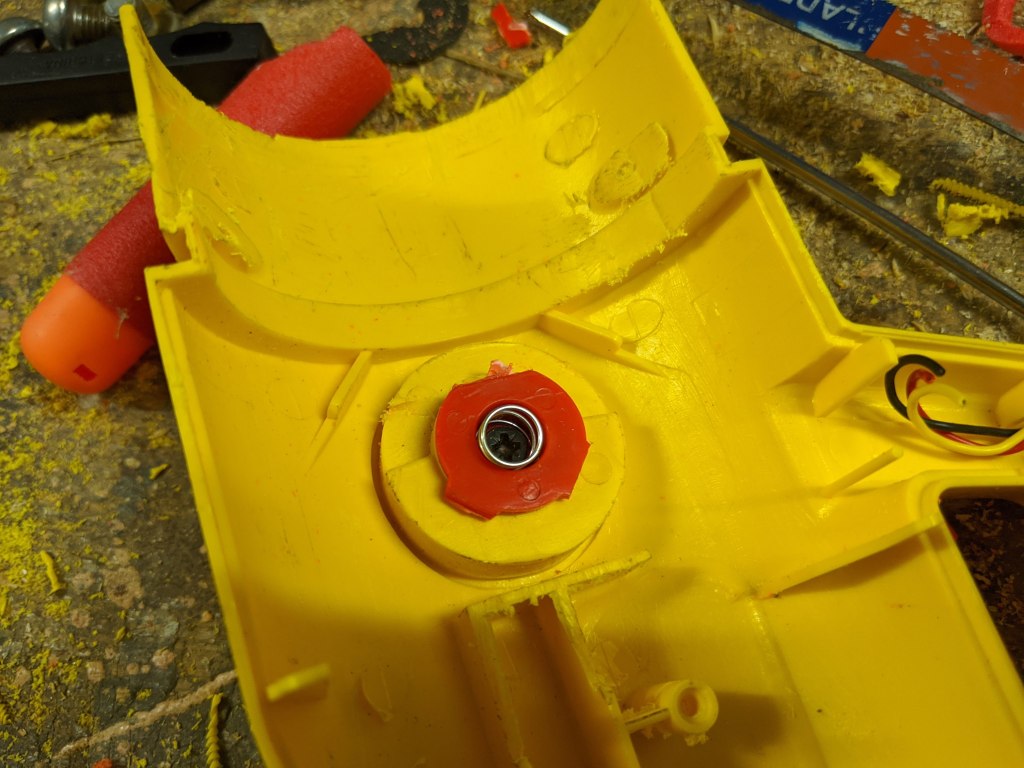
I ripped out the Playskool reflector, bulb and battery carrier then took to it with a hacksaw blade to make enough room. This took quite a bit of work to get the FT03 aligned correctly.
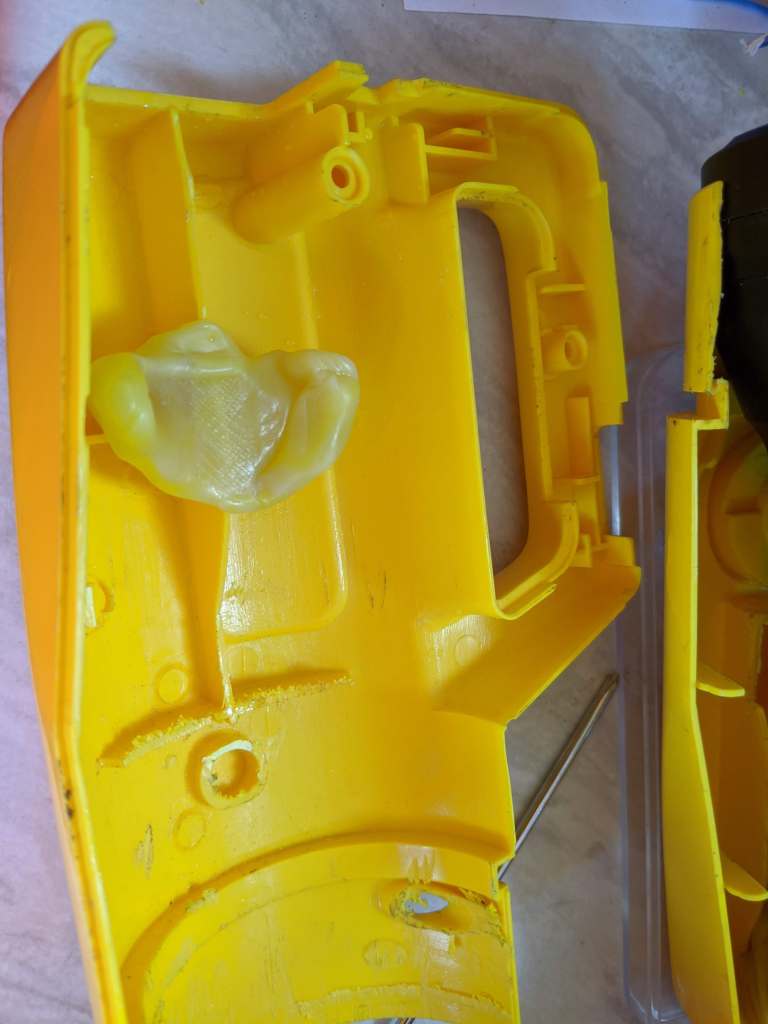
I used some Polydoh mouldable plastic to help keep the FT03 in place.
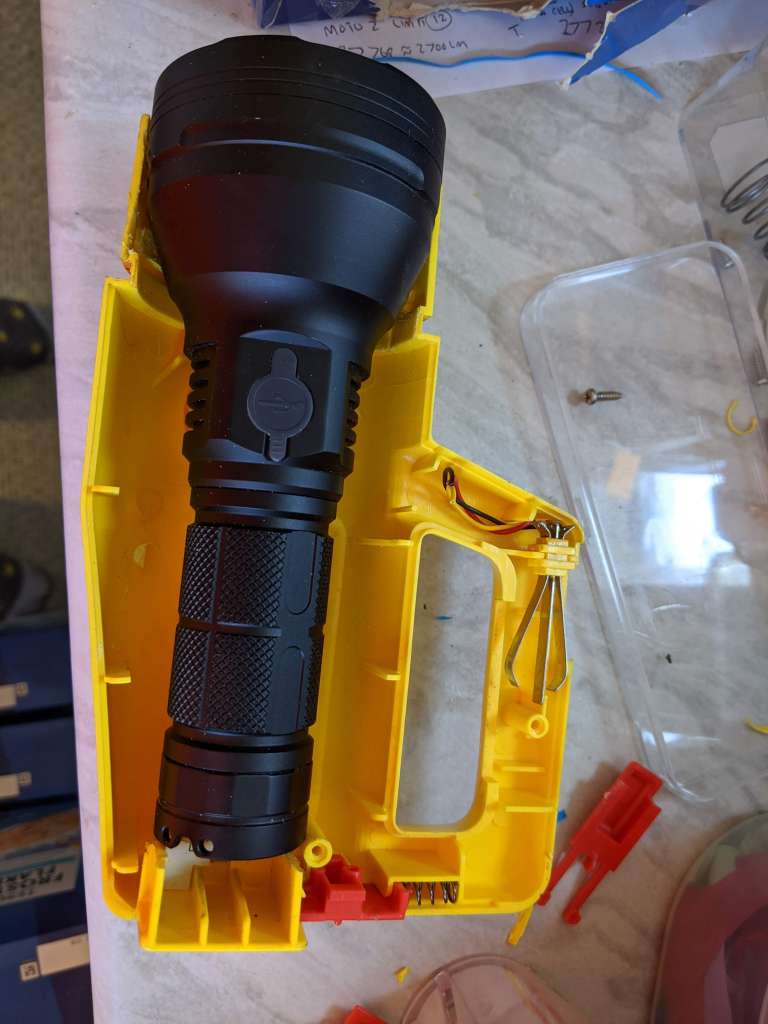
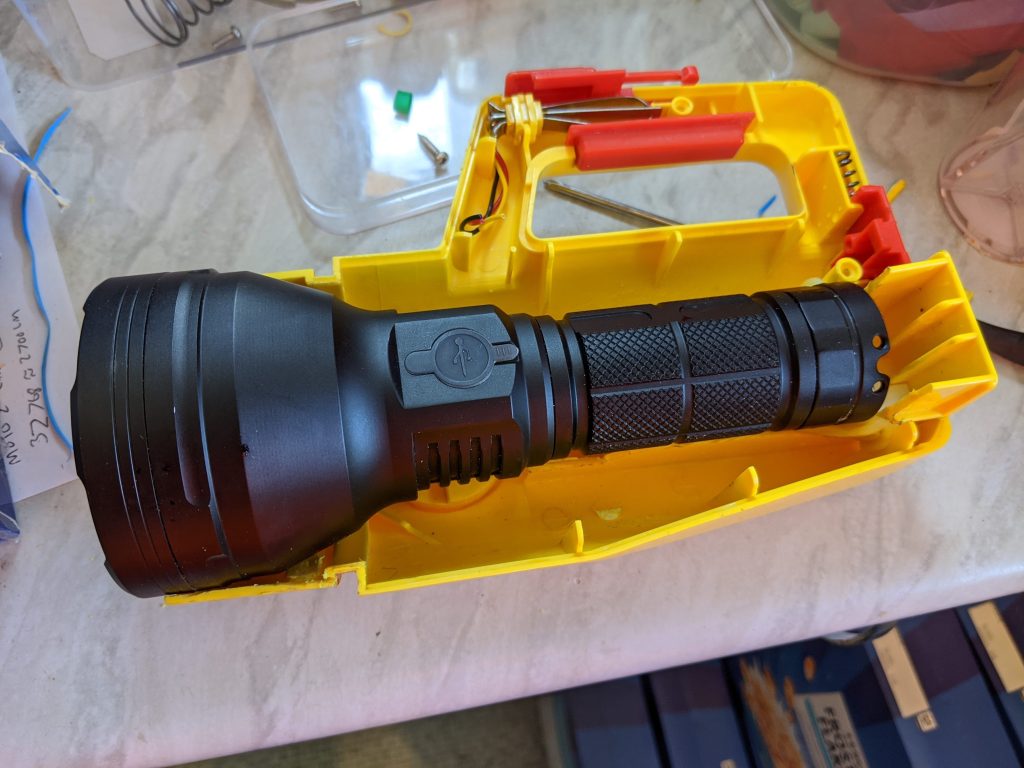
Eventually there was the right amount of room in the Playskool light and I’d got the switch to line up.
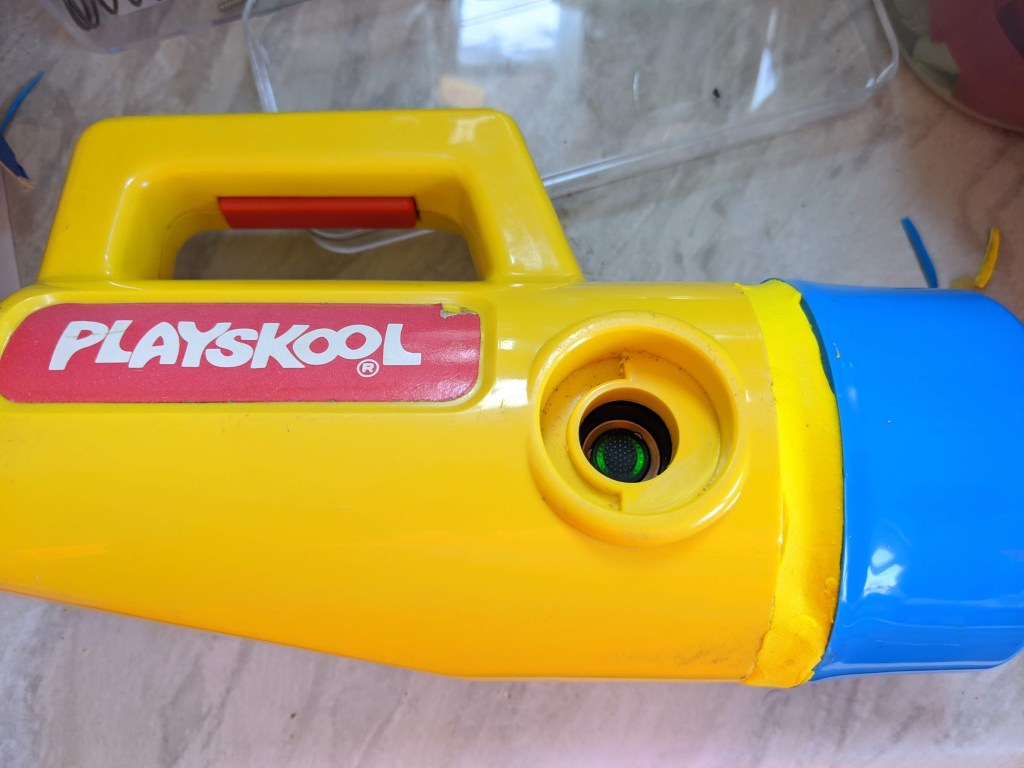
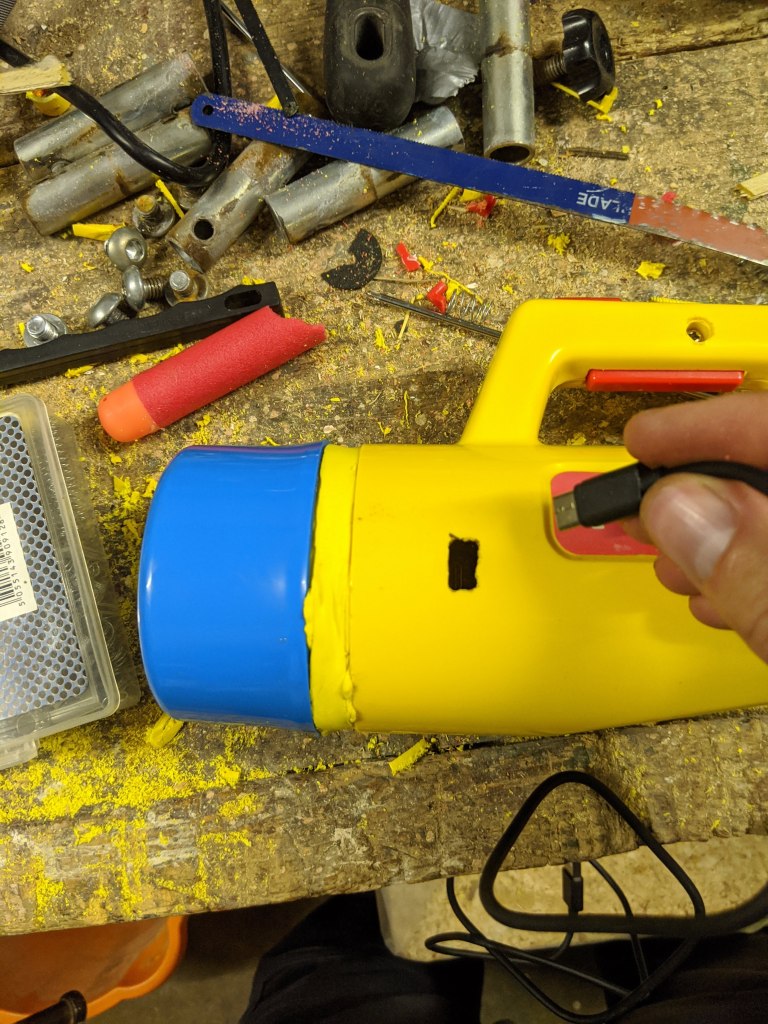
The blue bezel went back on. There was a bit of a gap, which I filled with some yellow foam. I left the FT03 switch accessible through the hole where the original switch was.

Testing the flashlight
It worked!
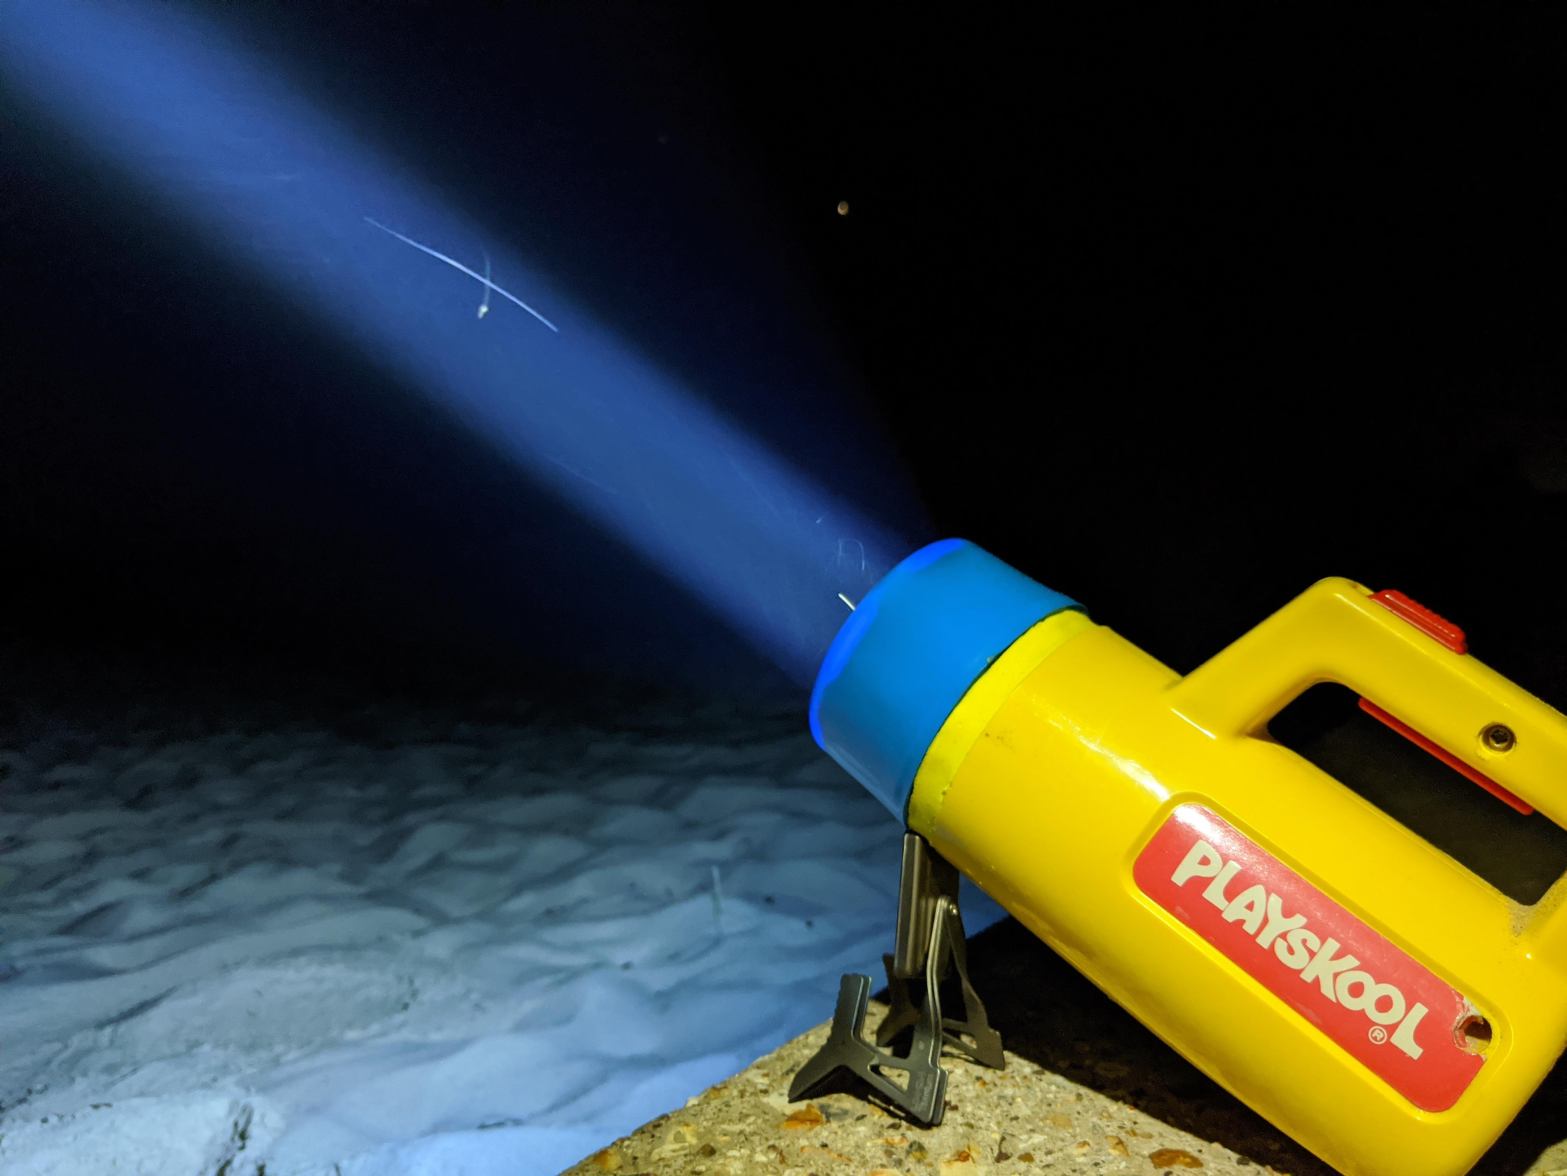
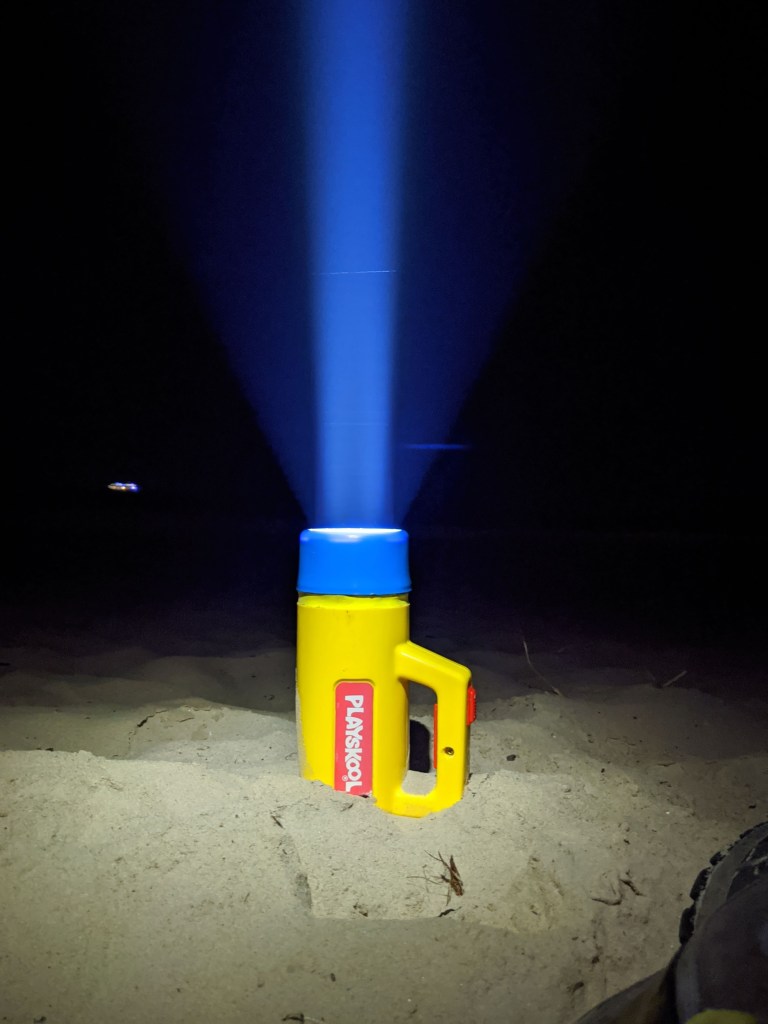
Once it was all put together, I went out for a walk through some woods and to the beach.
Here’s how the beam looked at the beach.


USB-C access
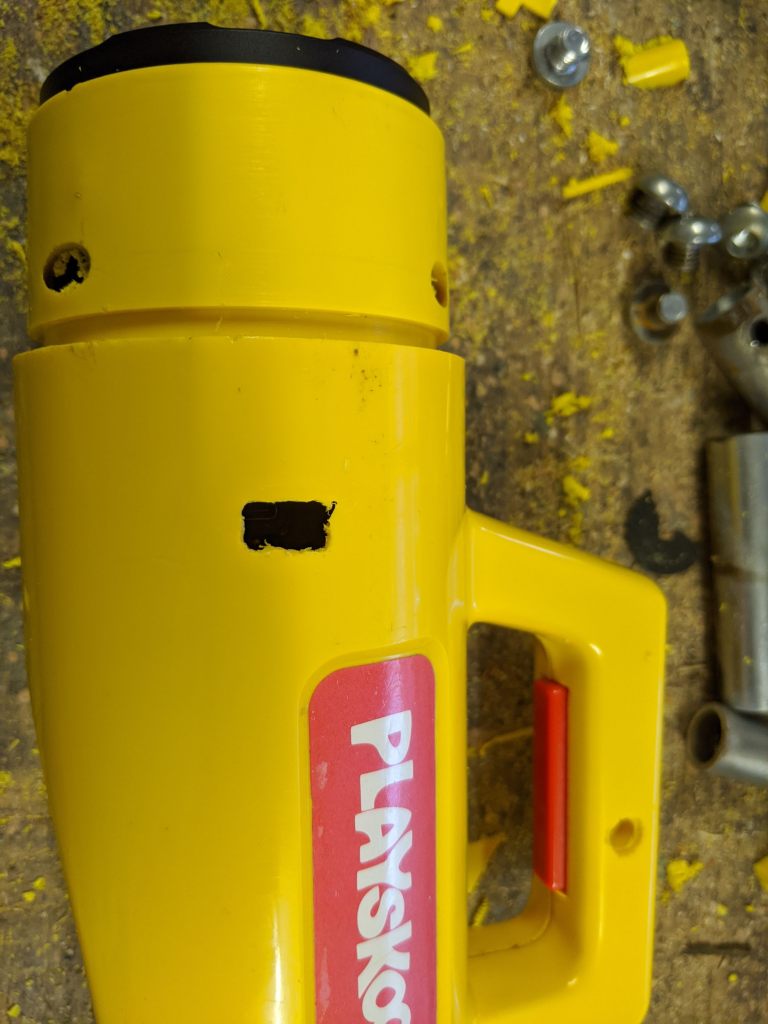
Charging the light required removing the bezel and unscrewing everything. That needed improving so I made a hole to access the USB port.
This is exposes the USB connection, so the light is no longer waterproof.


Original switch
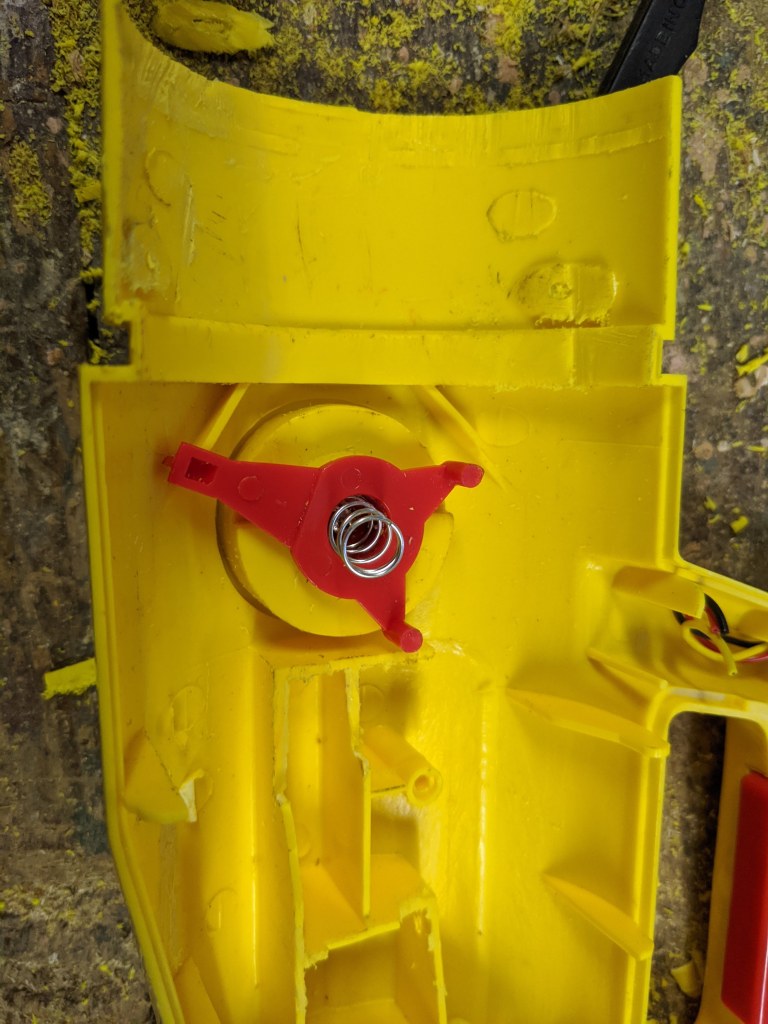
The recessed e-switch didn’t look right, so I found the original switch and tried to get it to activate the e-switch. Switches are a challenge, as they have to be aligned just right and have the right amount of travel. I tried a few different springs and some foam (more inspiration from u/Nelson_uk). Eventually a combination of the 2 worked. Foam to keep the switch away from the light, a sprint inside the plastic switch to make it longer and some foam between the 2 switches. Lots of respect for people who do this with proper switches and flashlights.


Next steps
If you have any suggestions for improvements then please let me know.
- cover USB port
- make it slightly more water resistant
- improve switch

Any chance you still have the color control part. The piece that pushes the color filter via the selector? One of my tabs is broken and can only get red or clear.
LikeLike
Hi. Sorry, I threw out all the odd bits like that.
If you can’t find a replacement then using a 3D printer might be an option.
LikeLike
Covering the USB port and making it more waterproof could be as easy as putting the whole thing in a bin liner. 🙂
Honestly, cool project. Stalked you here from BLF, not enough of us UK members over there.
RichH
LikeLike